Roland JD-800 Keybed Repair
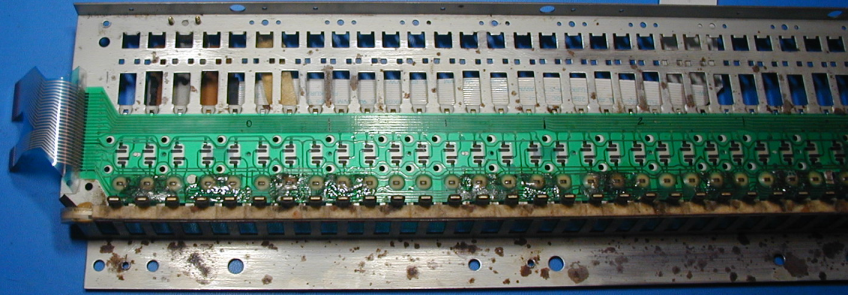
I recently purchased a JD-800 which had experienced the dreaded Roland red glue meltdown. Removing the glue from the keys and the weights is not hard and is well documented on the web, but if the glue has gotten onto the green contact flex pcb as shown in the photo, peeling it off will rip off the traces as well. The best plan would be to replace the flex pcb with a new one. These are no longer available from Roland, but replacements do show up on a popular auction site. I took a different approach, but would not recommend it.
Three Roland keyboards (and possibly others) use the same green flex key contact pcb: the JD-800, U-20 and D-5. But the method of connecting to it differs. All three use a heat seal, similar to those used on LCD displays, to connect a flex cable to the green flex pcb. This heat seal connection is very fragile and can easily come apart if you remove the plastic piece which holds the two halves together. (Re-attaching it requires special equipment):
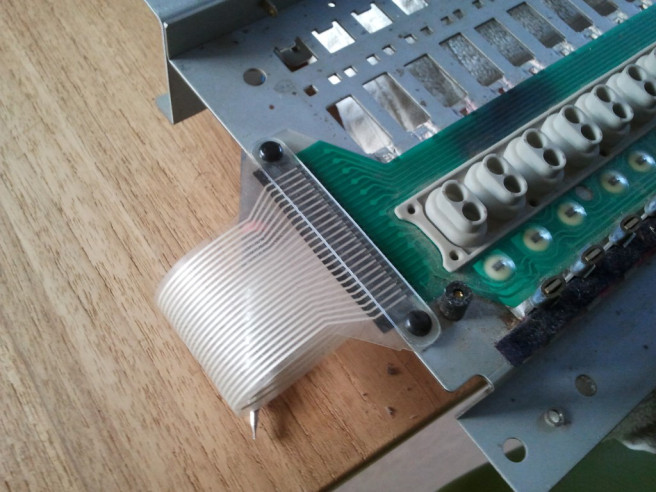
On the JD-800, the flex cable is very short and connects to a small pc board mounted under the keybed:
The aftertouch sensor also connects to this pcb. All of these signals are routed to a different kind of flex cable, which plugs into the main circuit board:

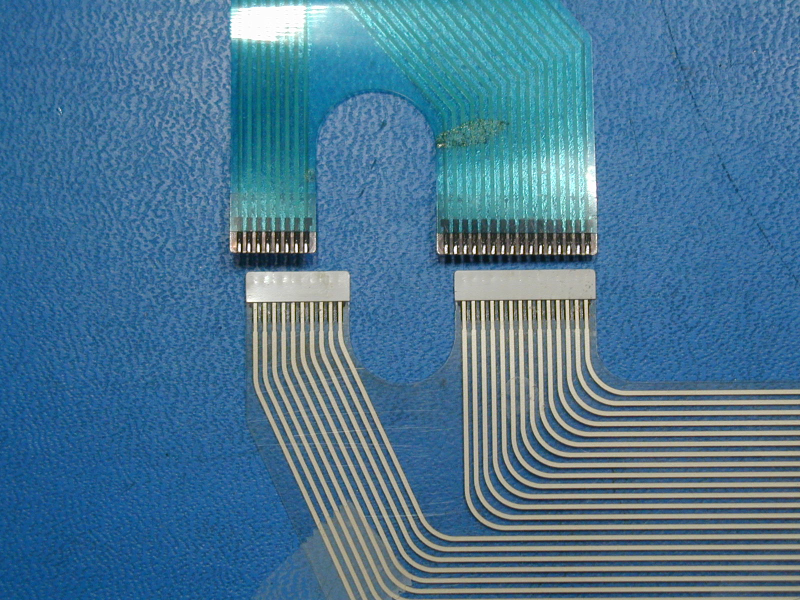
The U-20 and D-5 use a different connection scheme. They also have a flex cable heat-sealed to the green flex pcb, but theirs are longer, and plug directly into the main circuit board with no small pcb in-between. Here are the three different flexes:
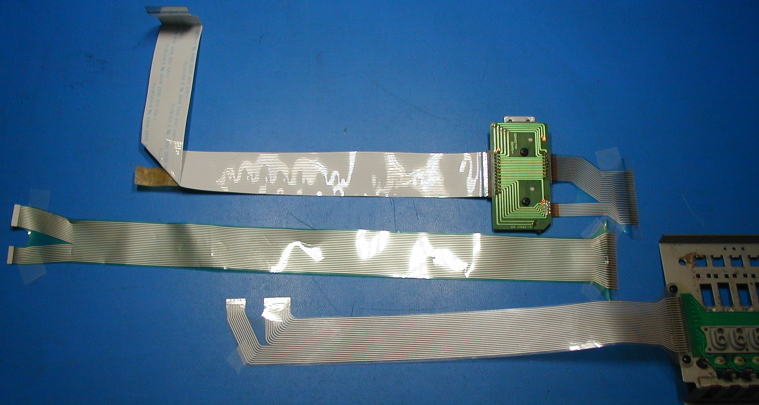
At the top is the JD-800 gray flex cable, the small pcb, and the short flex cable that is normally heat-sealed to the green key contact flex pcb. In the center, is the much longer flex cable used in the U-20, which is heat-sealed on one end, and plugged into the main pcb on the other. The D-5 flex cable is shown at the bottom, still attached to the green flex pcb. It has a right-angle bend at the end, where it would plug into the main circuit board. The green flex key contact pcb is identical in all three, but the flexes that are heat-sealed to it are different.
I decided to try adapting a U-20 or D-5 key contact flex pcb for use in the JD-800. Luckily, I found someone who was willing to take his (for sale) D-5 apart and remove the keybed, then all of the keys (to save weight) and ship me the rest. (Thanks!) The D-5 did not have aftertouch, but I decided that it would be too risky to move the green flex pcb to the JD-800 metal frame, as the heat seal would probably come apart. Instead, I carefully peeled up the JD-800 felt strip and aftertouch sensor, and installed them on the D-5 metal frame. I planned to move the small pcb from under the JD-800 keybed to the D-5 keybed. Seemed simple enough. Two problems emerged. I discovered that the signals were split differently on the D-5 flex cable from the JD-800 one:
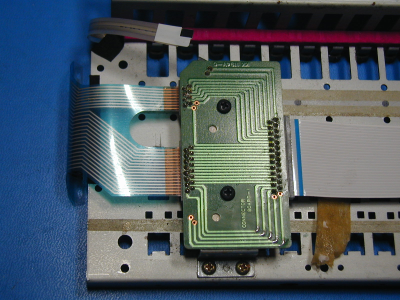
Ugh! So this meant that I had to order a larger flex connector for the smaller section and install it on the pcb. Digi-Key stocks the 1.25mm-pitch connectors, so that was not a big deal. The second problem was that because of the 90-degree bend, there wasn't enough space for the connector pcb to fit under the keybed, since it was designed for a flex with no bend, such as the JD-800 or the U-20 ones. I ended up solving this problem by cutting the connector board into three pieces, so that I could change the orientation of the connectors to make it work:
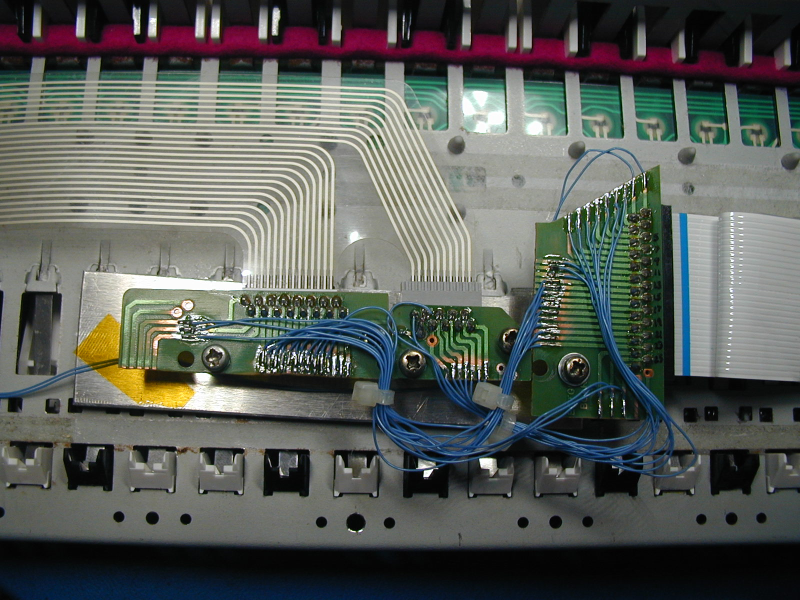
Using standoffs, I mounted the pieces on a small piece of aluminum, which is fastened to the key frame with double-stick foam. The gray flex connector on the middle board is the new 10-pin one from Digi-Key. The two wires on the left come from the aftertouch sensor::
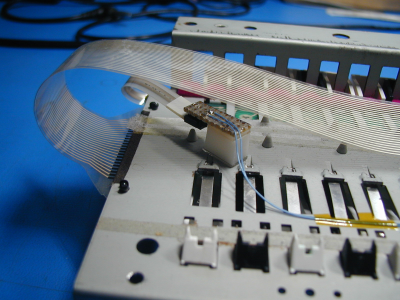
Here is another photo showing the new wiring:
The gray flex cable has several new bends in it, folding it back on itself to reduce the effective length.
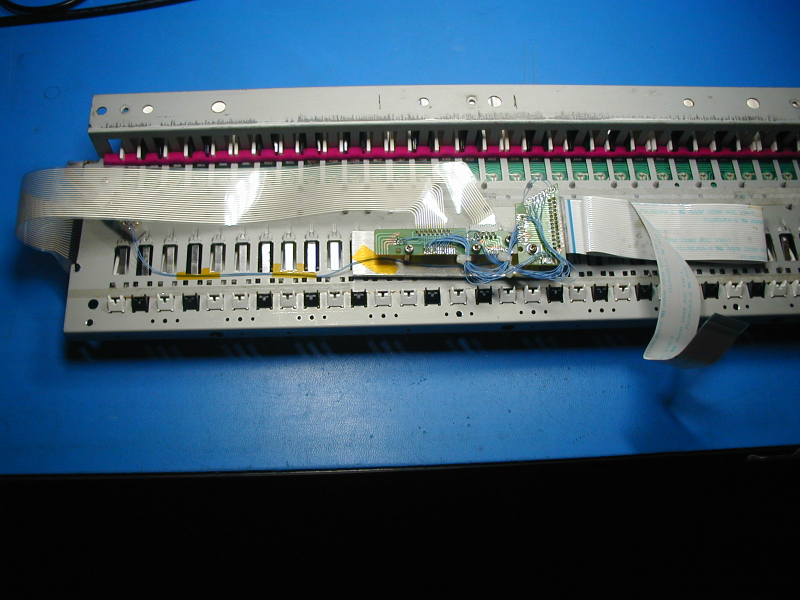
It works! Not pretty, and a lot more work than sourcing a replacement green flex contact pcb. For now I have left the key weights off, but may re-install them at some point.