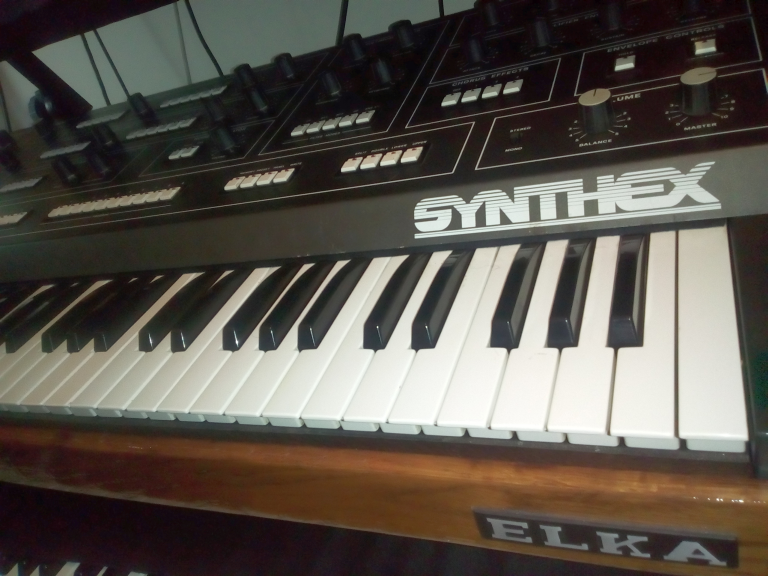
MIDI Key Interface for Early Revision Elka Synthex Synthesizers
Here are some code EPROM images for two versions of the firmware suitable for use in the Rev 1 unit pictured. These had four 2516 EPROMs, with the CPU data and address lines connected to the chips in an unusual way, thereby scrambling the data if you read it out using normal connections. So the designers would have had to pass their code image through some sort of software or hardware adapter that would scramble the address and data lines to the chips for programming. Unfortunately, I was not able to read one of the EPROMs from the version 0.4 code. The P1.4 EPROM seems to have stopped working, so I have not included any data from it. The last 4 digits of the file name are the 16-bit checksum of the file data.
Here is an archive containing two different versions of the Synthex Rev 1 firmware. The EPROM labels indicated V.4 and .5 These are images of the data as a normal EPROM programmer would read them, not as the Synthex 6502 would see the data. To make any sense of the data in these EPROMs, you would need to un-scramble it first. This code is from the early Synthex which had four 2516's, and would not work in the later units, which used 2532's.
New MIDI Key Interface for early Revision Synthexes
As many people know, Elka never offered a MIDI interface for the earliest version of the Synthex. These are the units which used four 2516 EPROMs. Because the design is different, the MIDI code written for later units would not run on them, even if there were enough room in the EPROMs. I thought it should be possible to design a small board which would accept MIDI note on/off messages and simulate keys being pressed. The Synthex keyboard circuitry is a little unusual, so a special design was needed. Only Note On/Off and MIDI reset are supported. The Synthex keyboard can be played at the same time as the MIDI one. A DIP switch is used to select the MIDI channel.
The first boards have arrived, and one has been installed and tested in the Synthex pictured above. Here are photos showing how it looks. This is the assembled pc board, before installation:

The pads on the MIDI board are arranged in the same order as the ones on the sequencer board, so the blue wires connect in the same order as before, and the yellow wires connect in order as well. Here is the board, all wired up, but not mounted:

We wanted to re-use the blue wires that connected the keybed to the sequencer board, and also to keep the wiring to the MIDI board as short as possible. There is not a lot of space available underneath the keyboard. Several different mounting options were considered. Here is the final result:

The standoffs under the sequencer board were adjusted to allow placing the top edge of the MIDI board underneath it. An insulator was placed under the MIDI board to prevent it making electrical contact with the metal chassis.


As you can see, lots of hand wiring was needed to install the board. This was done very carefully and checked several times for mistakes to avoid damage to the Synthex.
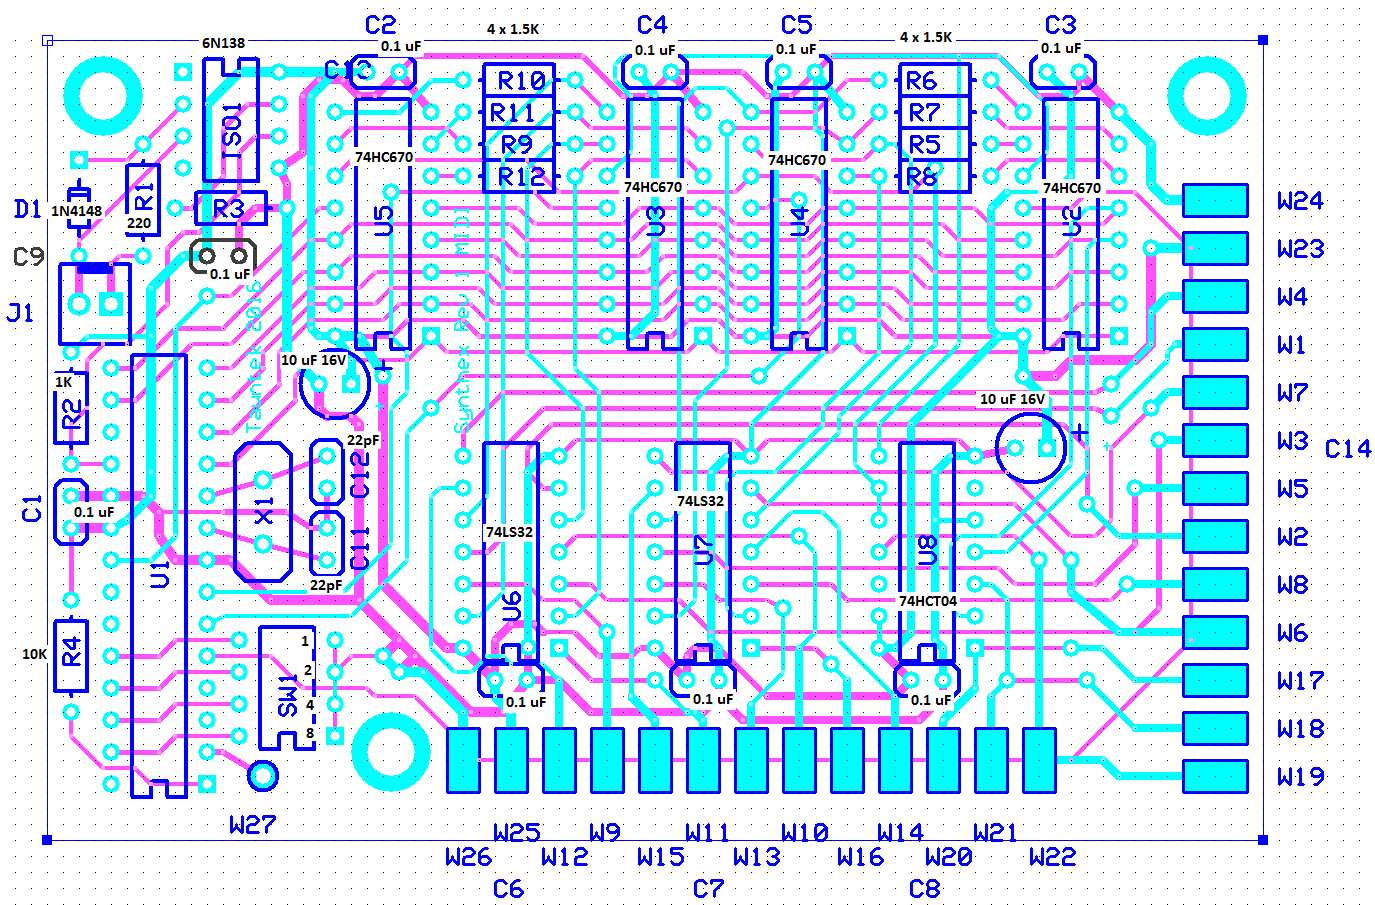
Here are a schematic, a parts placement diagram, and a parts list for the interface.
I am only offering blank pc boards, and programmed PIC chips for sale. The pc board is $34 and the PIC chip is $10. This does not include postage. The board is as pictured, and does not include soldermask or silkscreen, but is professionally manufactured. You would need to order, or have someone else order the other parts used and assemble the board, before it's ready to install. I will NOT be offering assembled boards. This is not a good project for learning how to solder. Building the board and installing it must be done very very carefully, or damage to the Synthex will result. Only someone with solid electronics skills should undertake building and installing this interface.
Please note: The information provided here is not guaranteed to be accurate. I will not be responsible for any damage to synthesizer circuitry caused by its use.